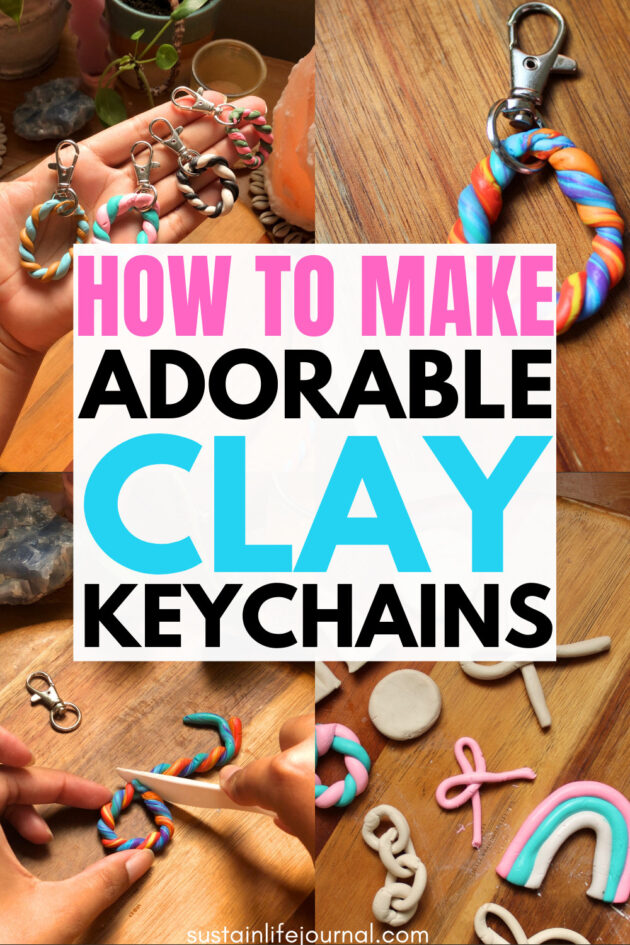
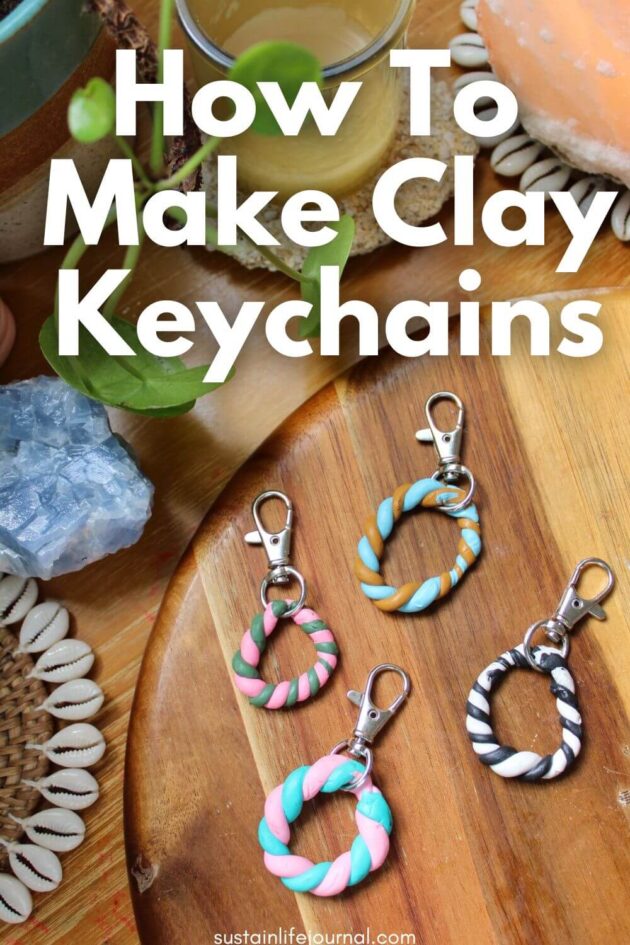
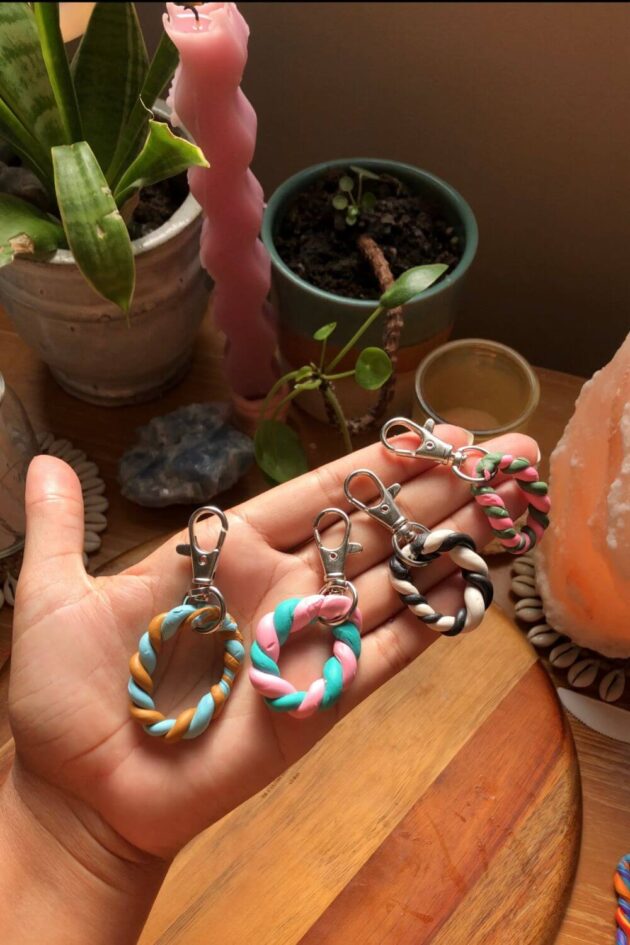
Easy Step By Step Guide On How To Make Clay Keychains
This post is all about how to make clay keychains and includes plenty of cute clay keychain ideas you can easily recreate.
Clay charms and trinkets are the perfect way to add a little fun to your keychain and they’re super easy to make!
All you need is a few materials and a bit of creativity (cute keychain inspiration is in this list!) and you can create your very own accessories to bring some extra joy to a boring accessory.
To be honest, it took me a bit of trial and error to figure out the best kind of clay to use and which clay keychain charms I could make that would actually turn out looking good.
Once I perfected the process I whipped up this simple tutorial for you to use to make clay keychains to sell, gift to your friends, or just enjoy on your own!
This post may contain affiliate links, which means I’ll receive a commission if you purchase through my links, at no extra cost to you. Please read full disclosure for more information.
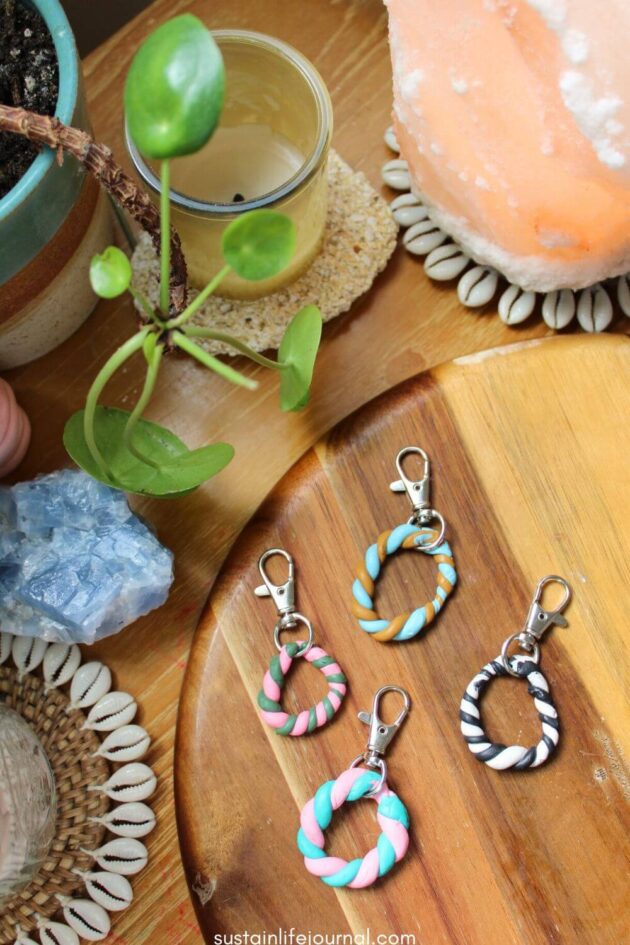
How to make cute keychains with clay
Materials you’ll need to make homemade clay keychains:
- Polymer clay (comes in different colors) or air dry clay (a white clay you can paint with acrylic paint)
- Keychain rings (optional: eye ring)
- Parchment paper (for baking)
- Rolling pin or smooth bottle
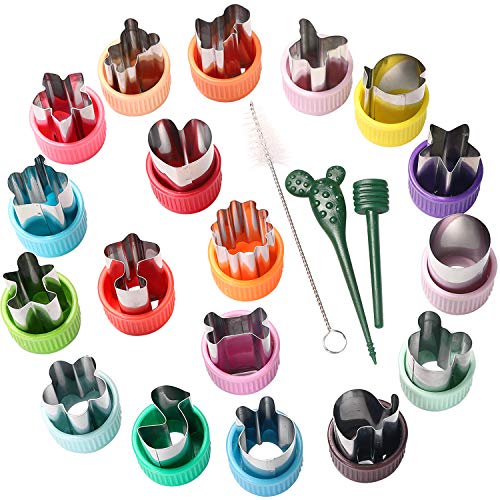
- Clay tools or household items (like toothpicks, butter knives, cookie cutter etc.)
- Baking tray
- Oven for baking the clay (unless you use air dry clay)
- Optional: Modge Podge (for a glossy finish)
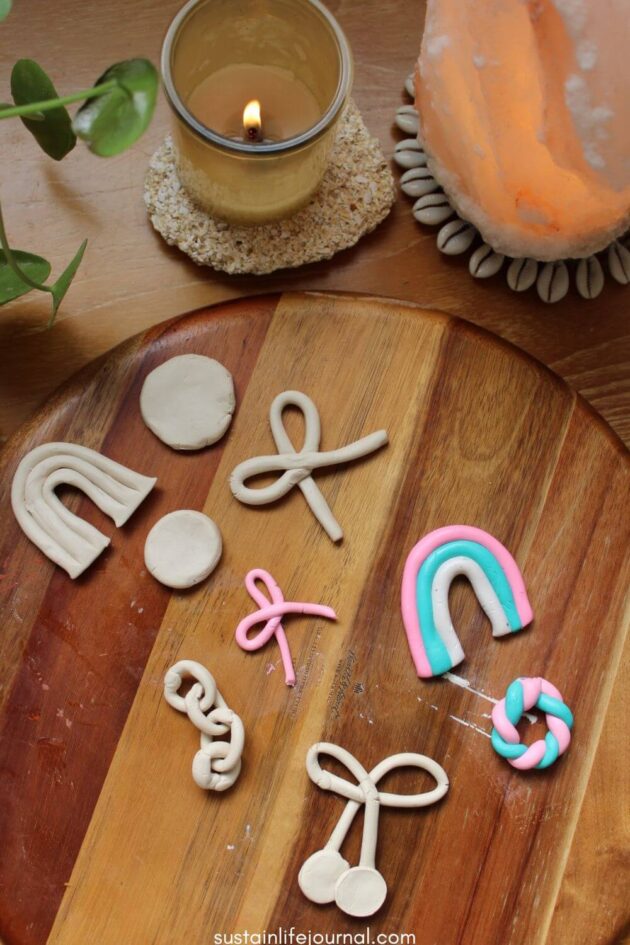
Step 1: Dream up your clay keychain design
The possibilities are endless when it comes to choosing the type of clay keychains you want to create.
When you’re first starting out it can be nice to go with basic shapes like hearts, stars, or circles. Then you can etch more details in them later like your initials, your name, or a cute saying.
DIY clay keychain ideas
- Rainbows
- Clay beads
- Layered hearts
- Your zodiac sign
- Puzzle pieces to match with your friend
- Cute animals (bear, unicorn, fish etc.)
- Miniature food (cherries, strawberries, watermelon etc.)
- Smiley face
- Abstract designs
- A few of these ideas combined into one keyring to create a quirky and colorful collection (:
Step 2: Choose your clay type and get your tools/workspace prepped
This is embarrassing, but I made the mistake of buying modeling clay at the craft store. If you aren’t super familiar with clay types, modeling clay (oil-based) doesn’t harden!
Luckily I had some air dry clay at home. This accident turned out to be a blessing in disguise because I now know that polymer clay probably makes the most sense for this craft. Ha!
Anyways, there’s pros and cons to each clay but I think polymer is your best bet.

{RECOMMENDED POST: 5 Easy Clay Candle Holder Ideas You Have To Make}
Here’s a quick breakdown of which clay is used for making keychains:
Polymer clay: Winner! This is the clay I suggest you buy to make your homemade clay keychains. I love that it comes in colors already so you don’t have to paint it (or you can!).
It’s not super sticky or messy like the other clays. You will have to bake it so keep that in mind.
Also, make sure to condition your polymer clay by rolling it around in your hands a bit. It can be stiff coming out of the package and this process can help prevent cracks later on. Once it’s soft and pliable, then it’s ready to use!
Air dry clay: It can be a bit messy and you will have to wait a few days to let it dry before you can paint it and use it as a keychain. I like that you can add water as you mold and easily etch into it if you want to add some texture or letters.

Modeling clay: no no no. Great for kids to play with but it’s basically like using playdough to make a functional object. Your keys will get lost in a blob of clay.
*make sure you prep a clean, dry, and flat surface to craft on. I like to use an old cutting board or parchment paper taped to a table. You can use a clay tool kit or just use items around your house to help shape your clay.
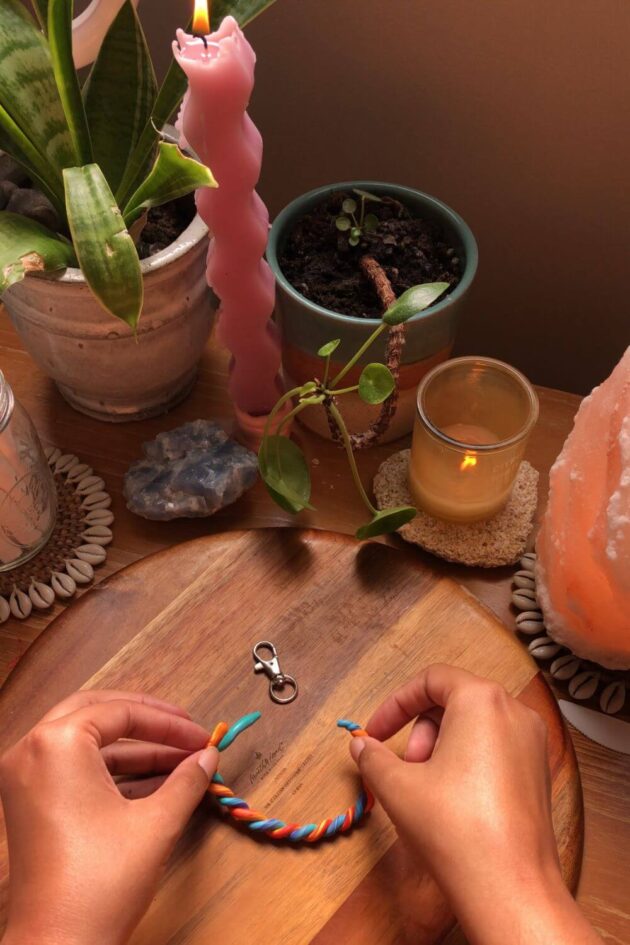
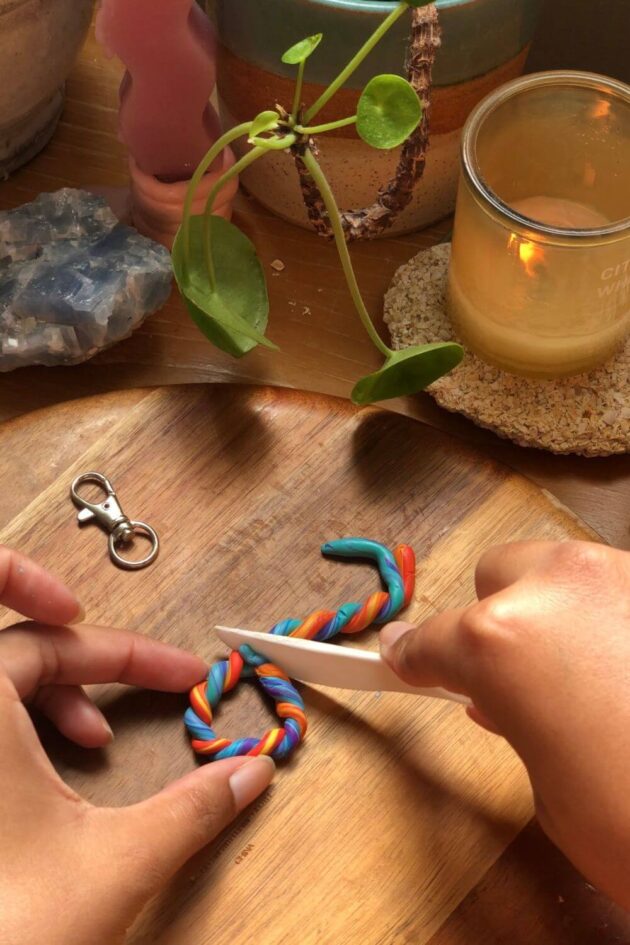
Step 3: Mold your keychain
For 3D clay charms it’s best to start with a small ball of clay. When making 2D clay charms you will want to use a rolling pin or bottle to create a smooth patch of clay that’s about ¼ inch in thickness.
The trick is to make your clay charms small enough to comfortably be able to carry them around but big enough so that you can easily mold them. If you make your charms too big and bulky they can easily shatter as well. Clay charms aren’t the most durable craft supply to use for making charms but they are cute!
Mini cookie cutters with be your best friend if you are struggling to get the exact shape you want in your clay charms.
Again, clay tools are helpful but you can simply use the utensils, toothpicks, pencils, or stamps you already own for your creations.
Step 4: Don’t forget to add the keyring to your clay charms
Don’t get too carried away with your designs and forget to poke a hole for the keyring! If you are using air-dry clay, you can attach the key ring before it dries completely.
If you are using polymer clay then make sure to poke a hole in your charm so you can add the keyring when it’s done baking. Or you can insert an eye pin to clip on your key ring later.
{RECOMMENDED POST: 11 Relaxing Cozy Hobbies to Add to Your Self Care Routine}
Step 5: Bake your clay charm or let it air-dry
Use the instructions on the back of your clay package but for the most part polymer clay bakes around 265°F-275°F for about 15-30 minutes.
Put a piece of parchment paper down on your baking tray and keep an eye on them as they bake. Your clay charms should be firm but if they are left in the oven too long they can burn or get discolored.
Step 6: Glaze or paint your clay keychains
If you used air dry clay then you may want to add some paint to spruce them up. I suggest using acrylic paint on them.
On either type of clay, you can add a thin layer of Modge Podge to protect them from scratches, chipped paint, and humidity.
Make sure your clay charms are cooled off from the oven or the sun before painting them.

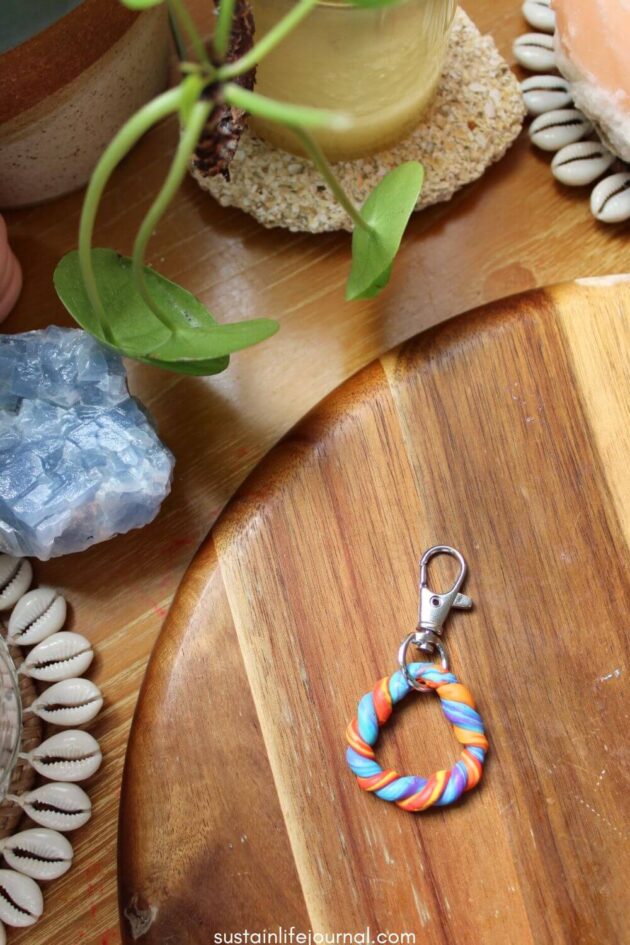
Step 7: Time to assemble your keychain
Attach your jump ring through the eye pin or the hole you created.
You can use your hands or small piers if needed to make it extra secure. Lastly, add your keychain ring and you’re all set!
{RECOMMENDED POST: Easy to Download Free Printable Coloring Sheets}
DIY clay projects tips and tricks
- Smoosh various colors together to get a marble effect for unique keychains.
- Use a dry sponge to sand off rough edges after baking or drying out if you use air-dry clay.
- Use different items to add texture to your clay keychain. Leaves, lace, toothpicks, beads, and seashells can be fun items to use to create a unique look.
- If your clay charms are sticky after baking they may need a bit more time in the oven.
- These charms and processes can work for clay jewelry as well!
Clay keychain basic tutorial
I hope this quick clay keychain tutorial was helpful to you and gave you some inspiration on fun keychains you can create.
If you are new to working with clay or haven’t used it in a while, give yourself enough time (and grace) to mess up your creations and make new ones! It’s all part of the process.
Once you get the basics down, you can build upon your skills and create more and more unique clay charms to hang on your key ring. Happy crafting!
Have any other cute clay charm ideas to add to keychains? Let us know in the comments below! I’m sure others in the community would love to learn from you as well.
Stay well,
Maggie
This post was all about clay crafts keychains anyone can make.
Other posts you may like:
17 Creative Solutions For How to Organize Kids Art Supplies
14 Genius Tips For How to Organize Wrapping Paper Like a Pro
11 Genius School Supplies Storage Ideas For Back to School
Super Easy DIY Shower Melts To Enhance Your Shower Routine
If you would like to save this handmade clay keychain tutorial for later-pin it!